

Camera Drawings
I developed this series of Camera Drawings using digital cameras, and now include Polaroid and other instant cameras.
This is a generalised description for a method rather than any particular artwork and is an account of the development process I went through to get to where I am now.
Aim
To use a camera as a drawing instrument.
Materials
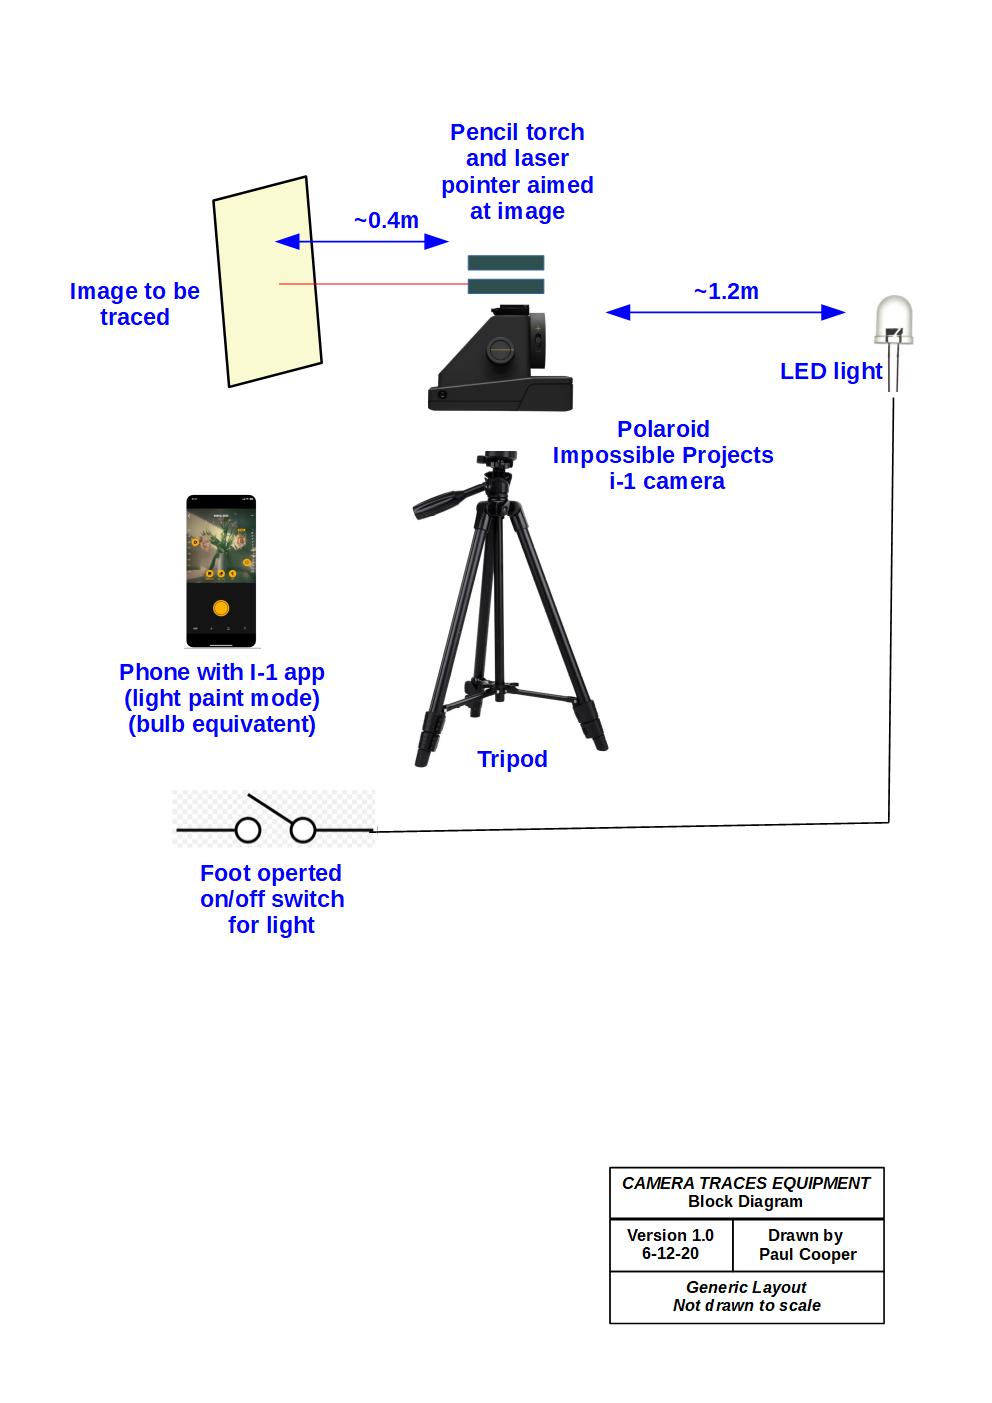
A darkened room
Polaroid Impossible Project i-1 camera
Polaroid i-Type file
Camera tripod
Laser pointer (modified to ‘stay on’)
Torch (to see in the dark)
Prepared image/line drawing (and somewhere/somehow to affix into position to enable the tracing.
Fixed light source (I use an LED with a floor operated on/off switch)
Dimensions
Equipment (LxWxH m): 3 x 0.5 x 1.5
Film (artwork unframed) (LxW mm): 119 x 87
Image sans film border (LxW mm): 76 x 76
Method
- IMPORTANT: The image on the film will be an upside reversed version of the original so create one that accounts for this – especially if you are writing words, etc.
- NOTE: Drawing will be completed in one sitting – there is no going back – what you do here is what you get.
- Find an image to trace – simple single line-type images work best.
- Set up equipment as listed above and as detailed on diagram below.
- Using view finder, aim camera at light source (ensure light is centred in view finder)
- Remove view finder and attach torch/laser point to camera where view finder normally sits. (I tape the bits to a magnet)
- Using the laser pointer, mount the image central to laser point about 1.2m from rear of camera.
- Use the torch to light up image for ease of tracing in the dark.
- Open i-1 app on a phone and turn camera on to Bluetooth mode, connect phone to camera.
- Select the app’s “Light Painting” mode
- Turn off room light.
- Press shutter control on app
- Release tripod pan/tilt clamp
- Turn on light source
- Use the laser light to trace the image by panning and tilting the camera
- Turn light source off to effectively “lift your pencil off the page” to move to an unconnected area of your image, then turn light back on to continue “drawing”.
- When finished, turn light source off and press shutter button on app. Secure the tripod, turn off laser pointer, turn on room light. Remove film from camera and allow developing to take place as per manufacturer’s instructions.
- voilà
Findings
Originally I was using a digital cameras with Bulb shutter control before moving onto the Polaroid camera for reasons as detailed below.
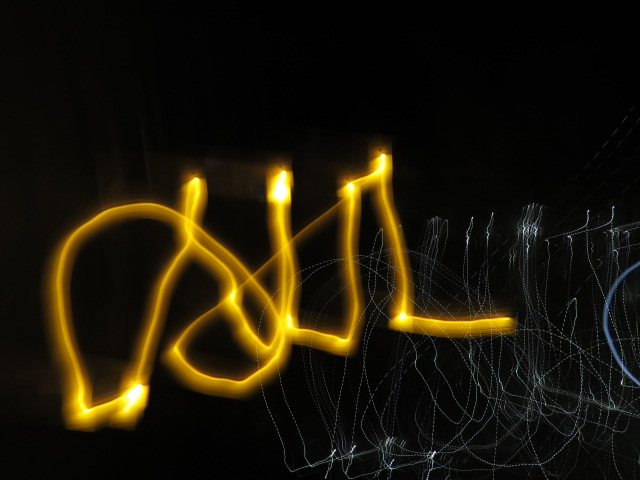
For my very first attempt, which was a completely unplanned experiment I used an outside wall mounted light and got some interesting results. Just like a new pen (which the camera is sort of) after a few scribbles, I wrote my name.


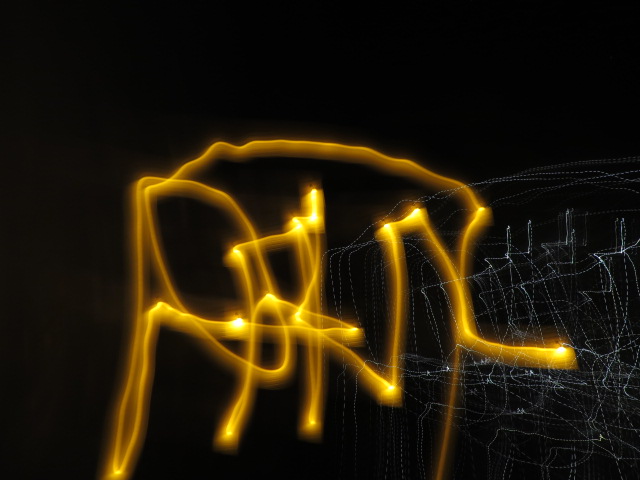
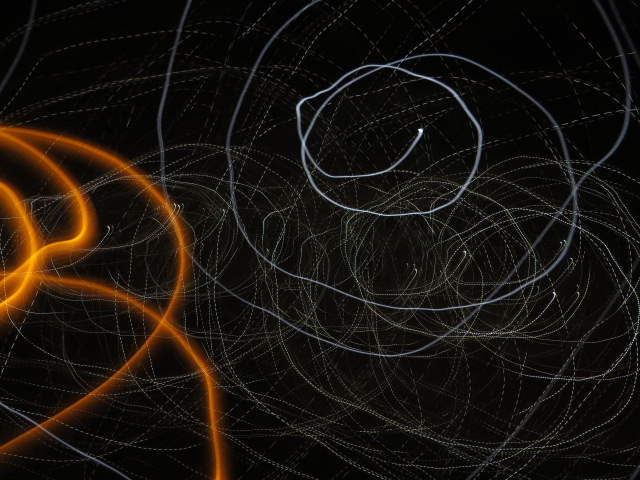
I continued experimenting with various light sources and camera movements, but I was not taken with the abstractions.
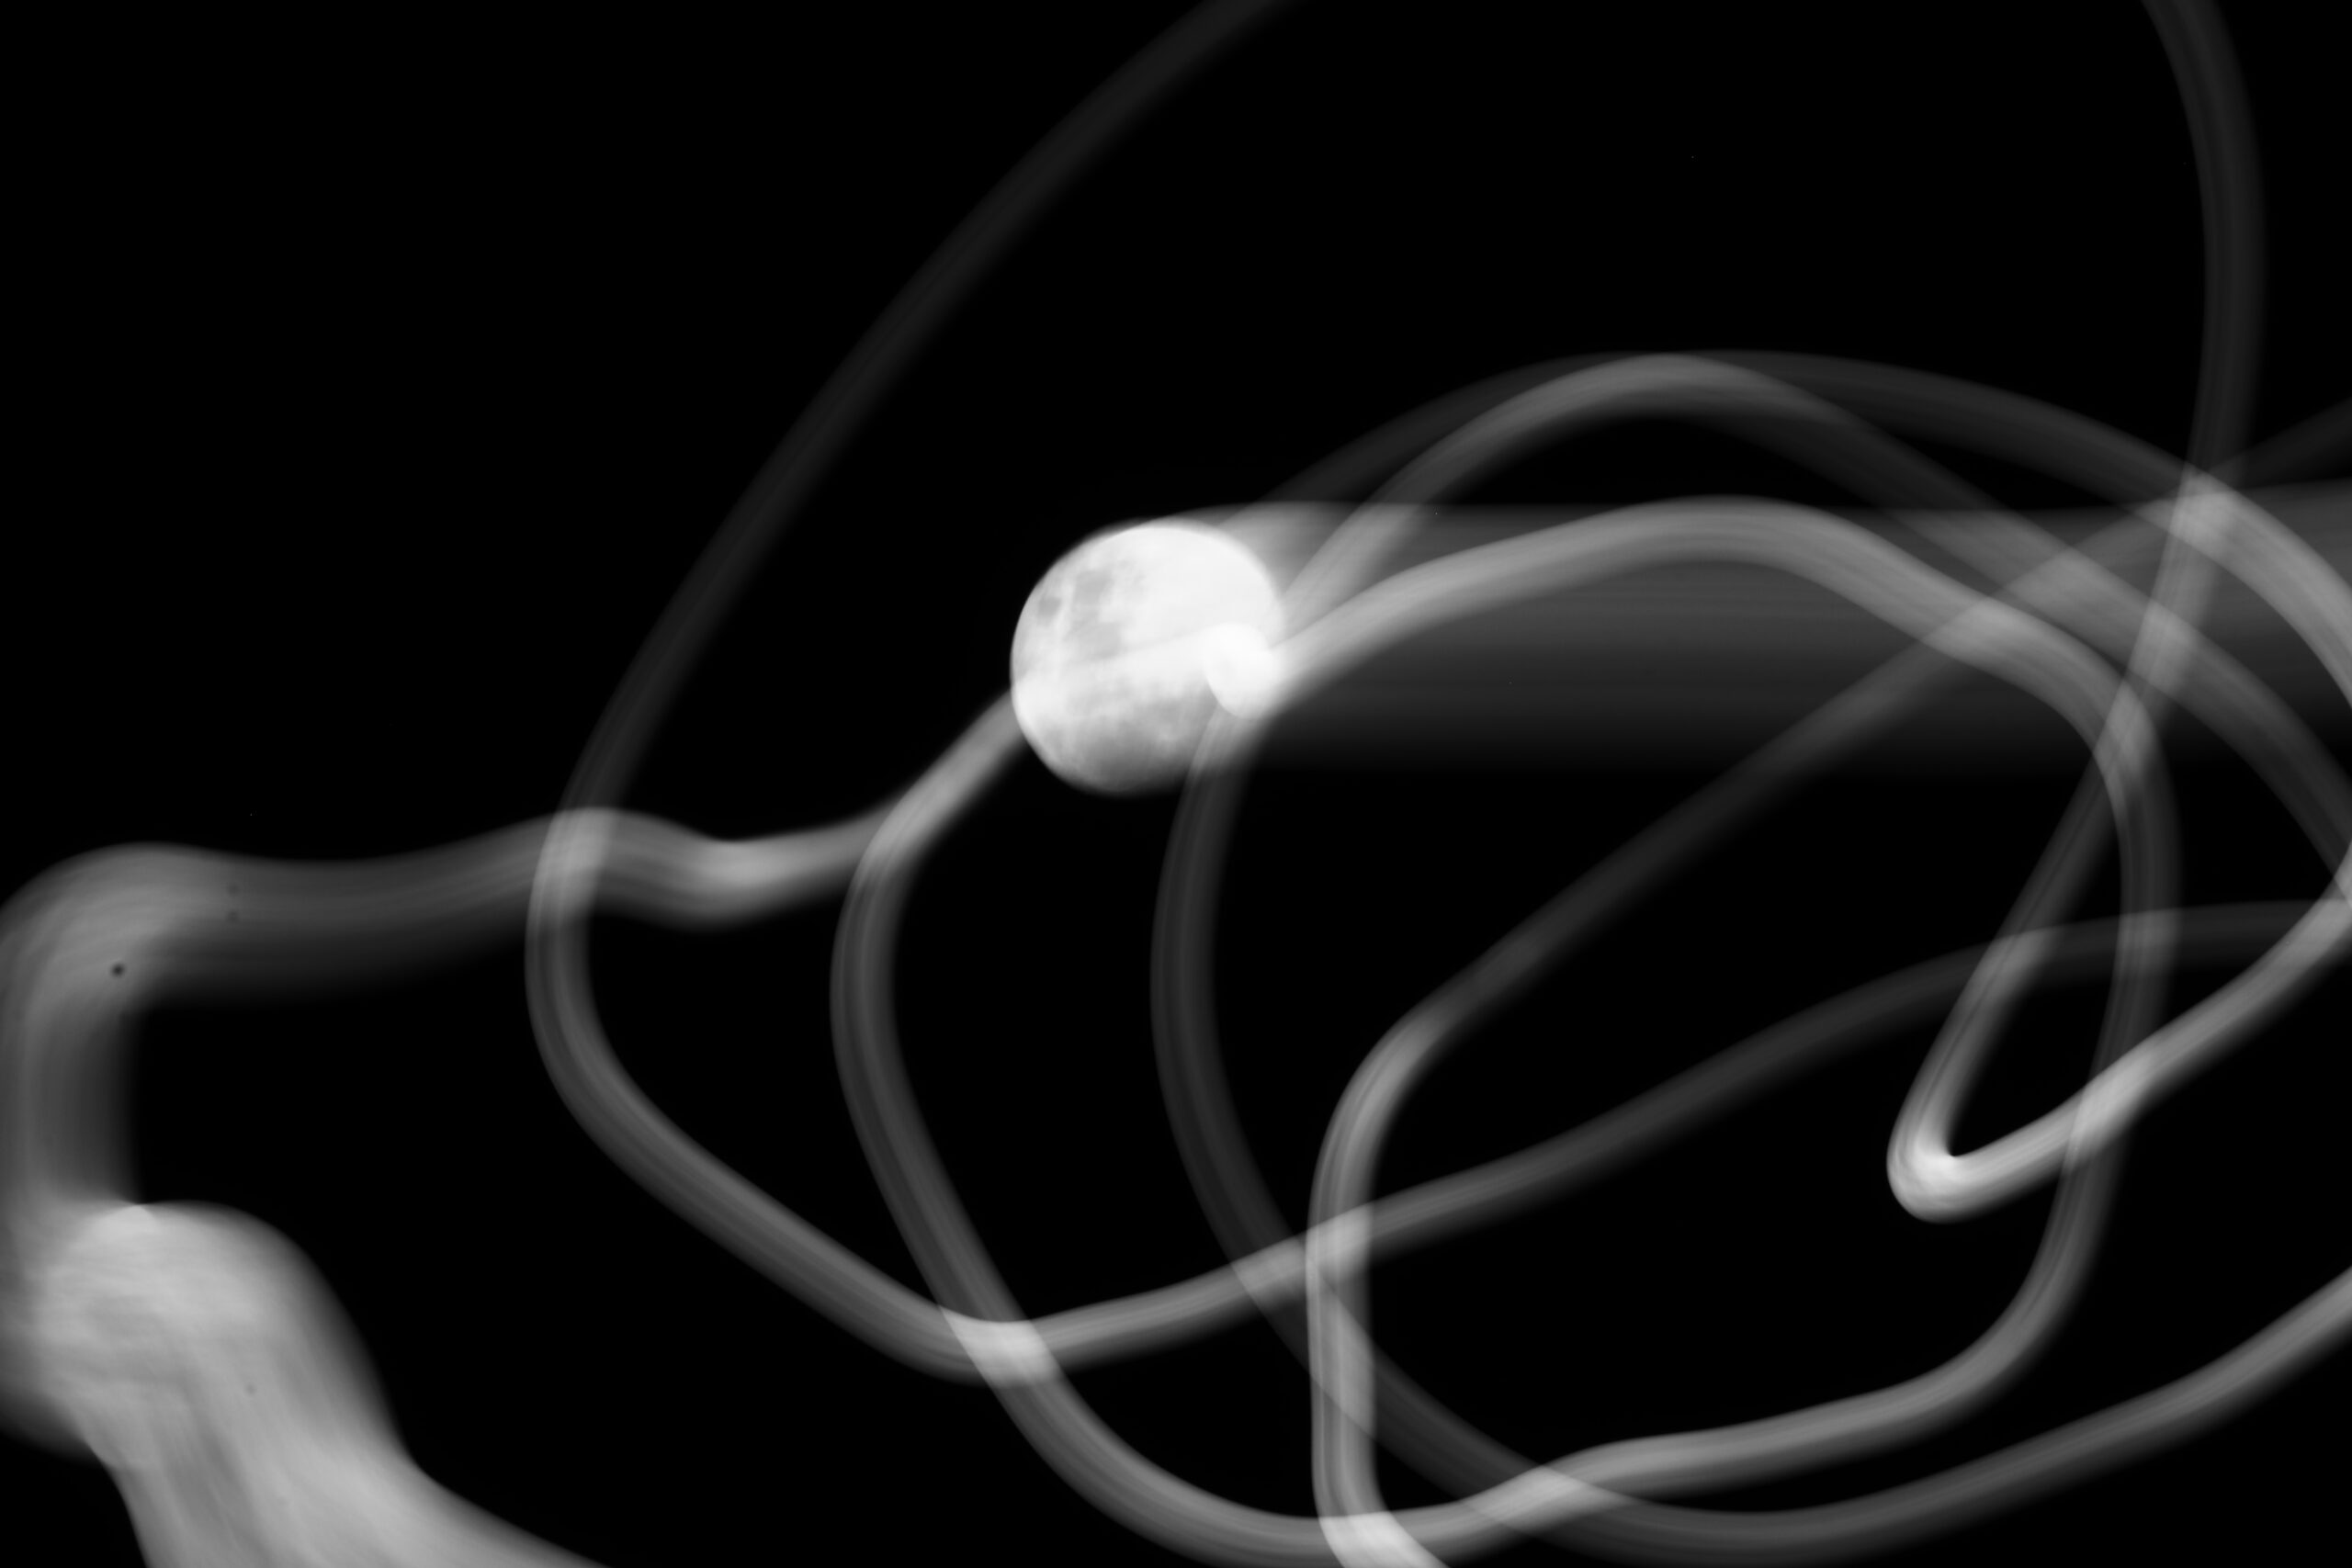
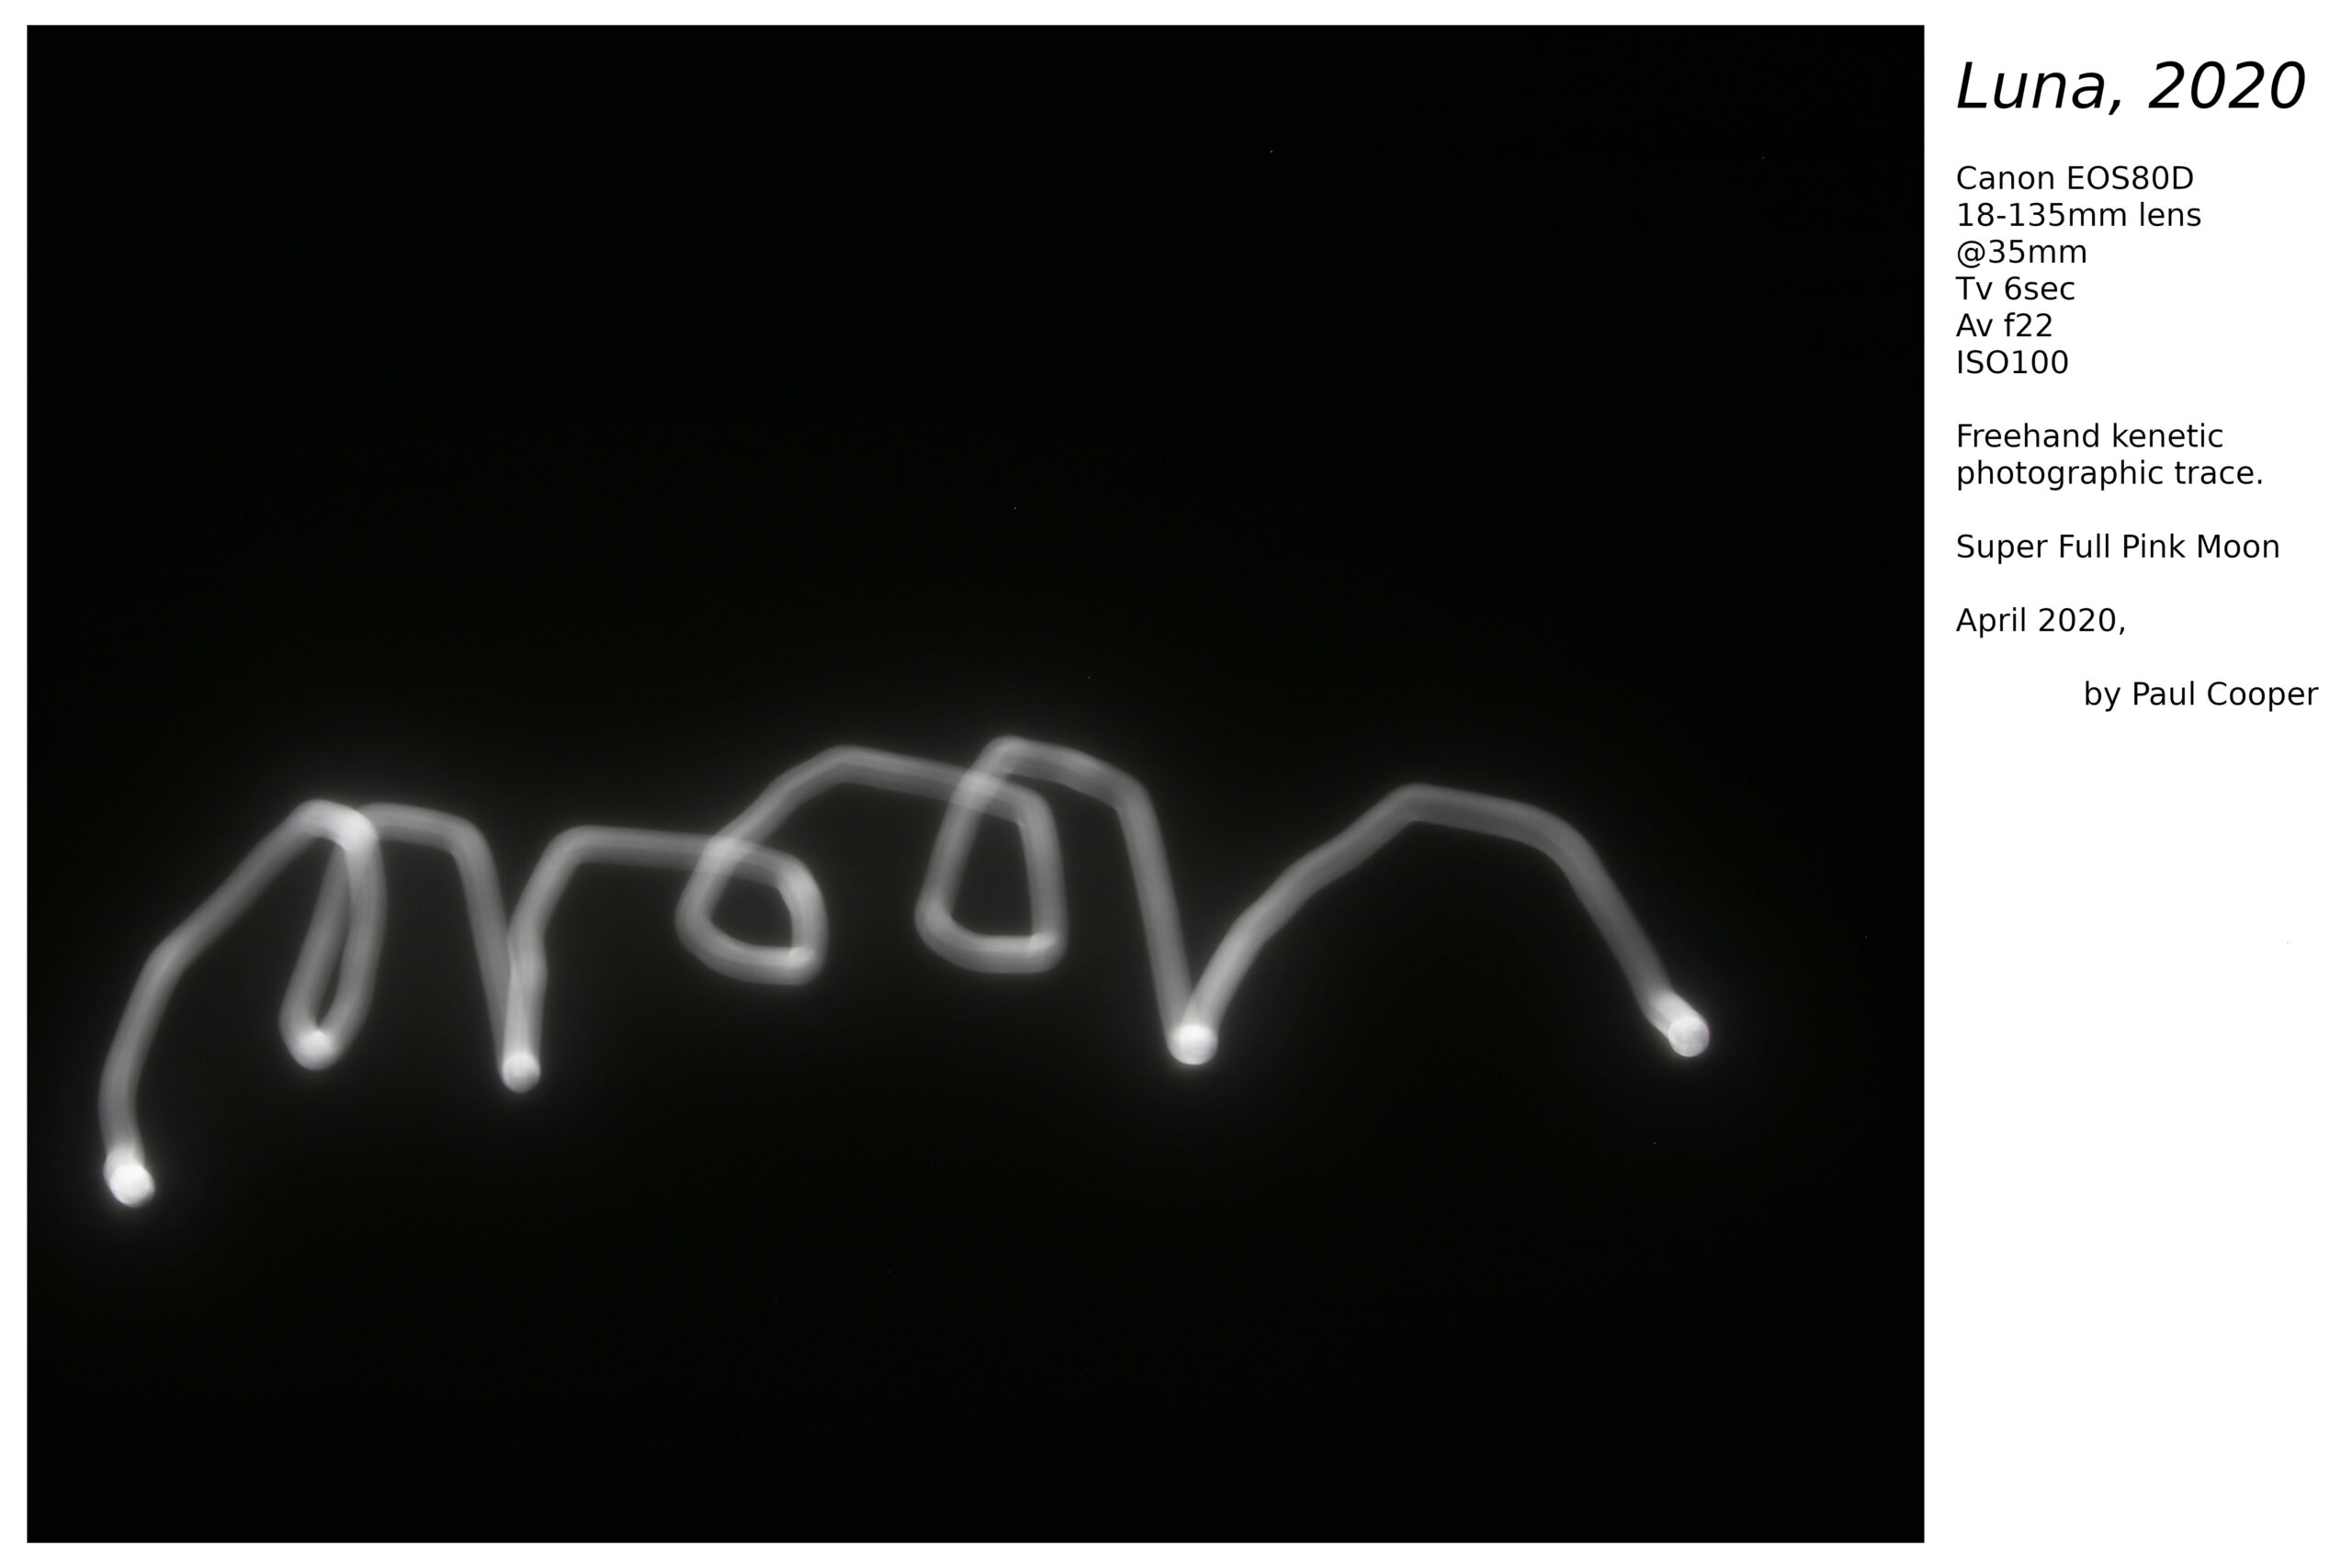
Next on light source list was the moon, which was most effective and added the possibilities of conceptual connections (at this stage, as yet to be fully explored)
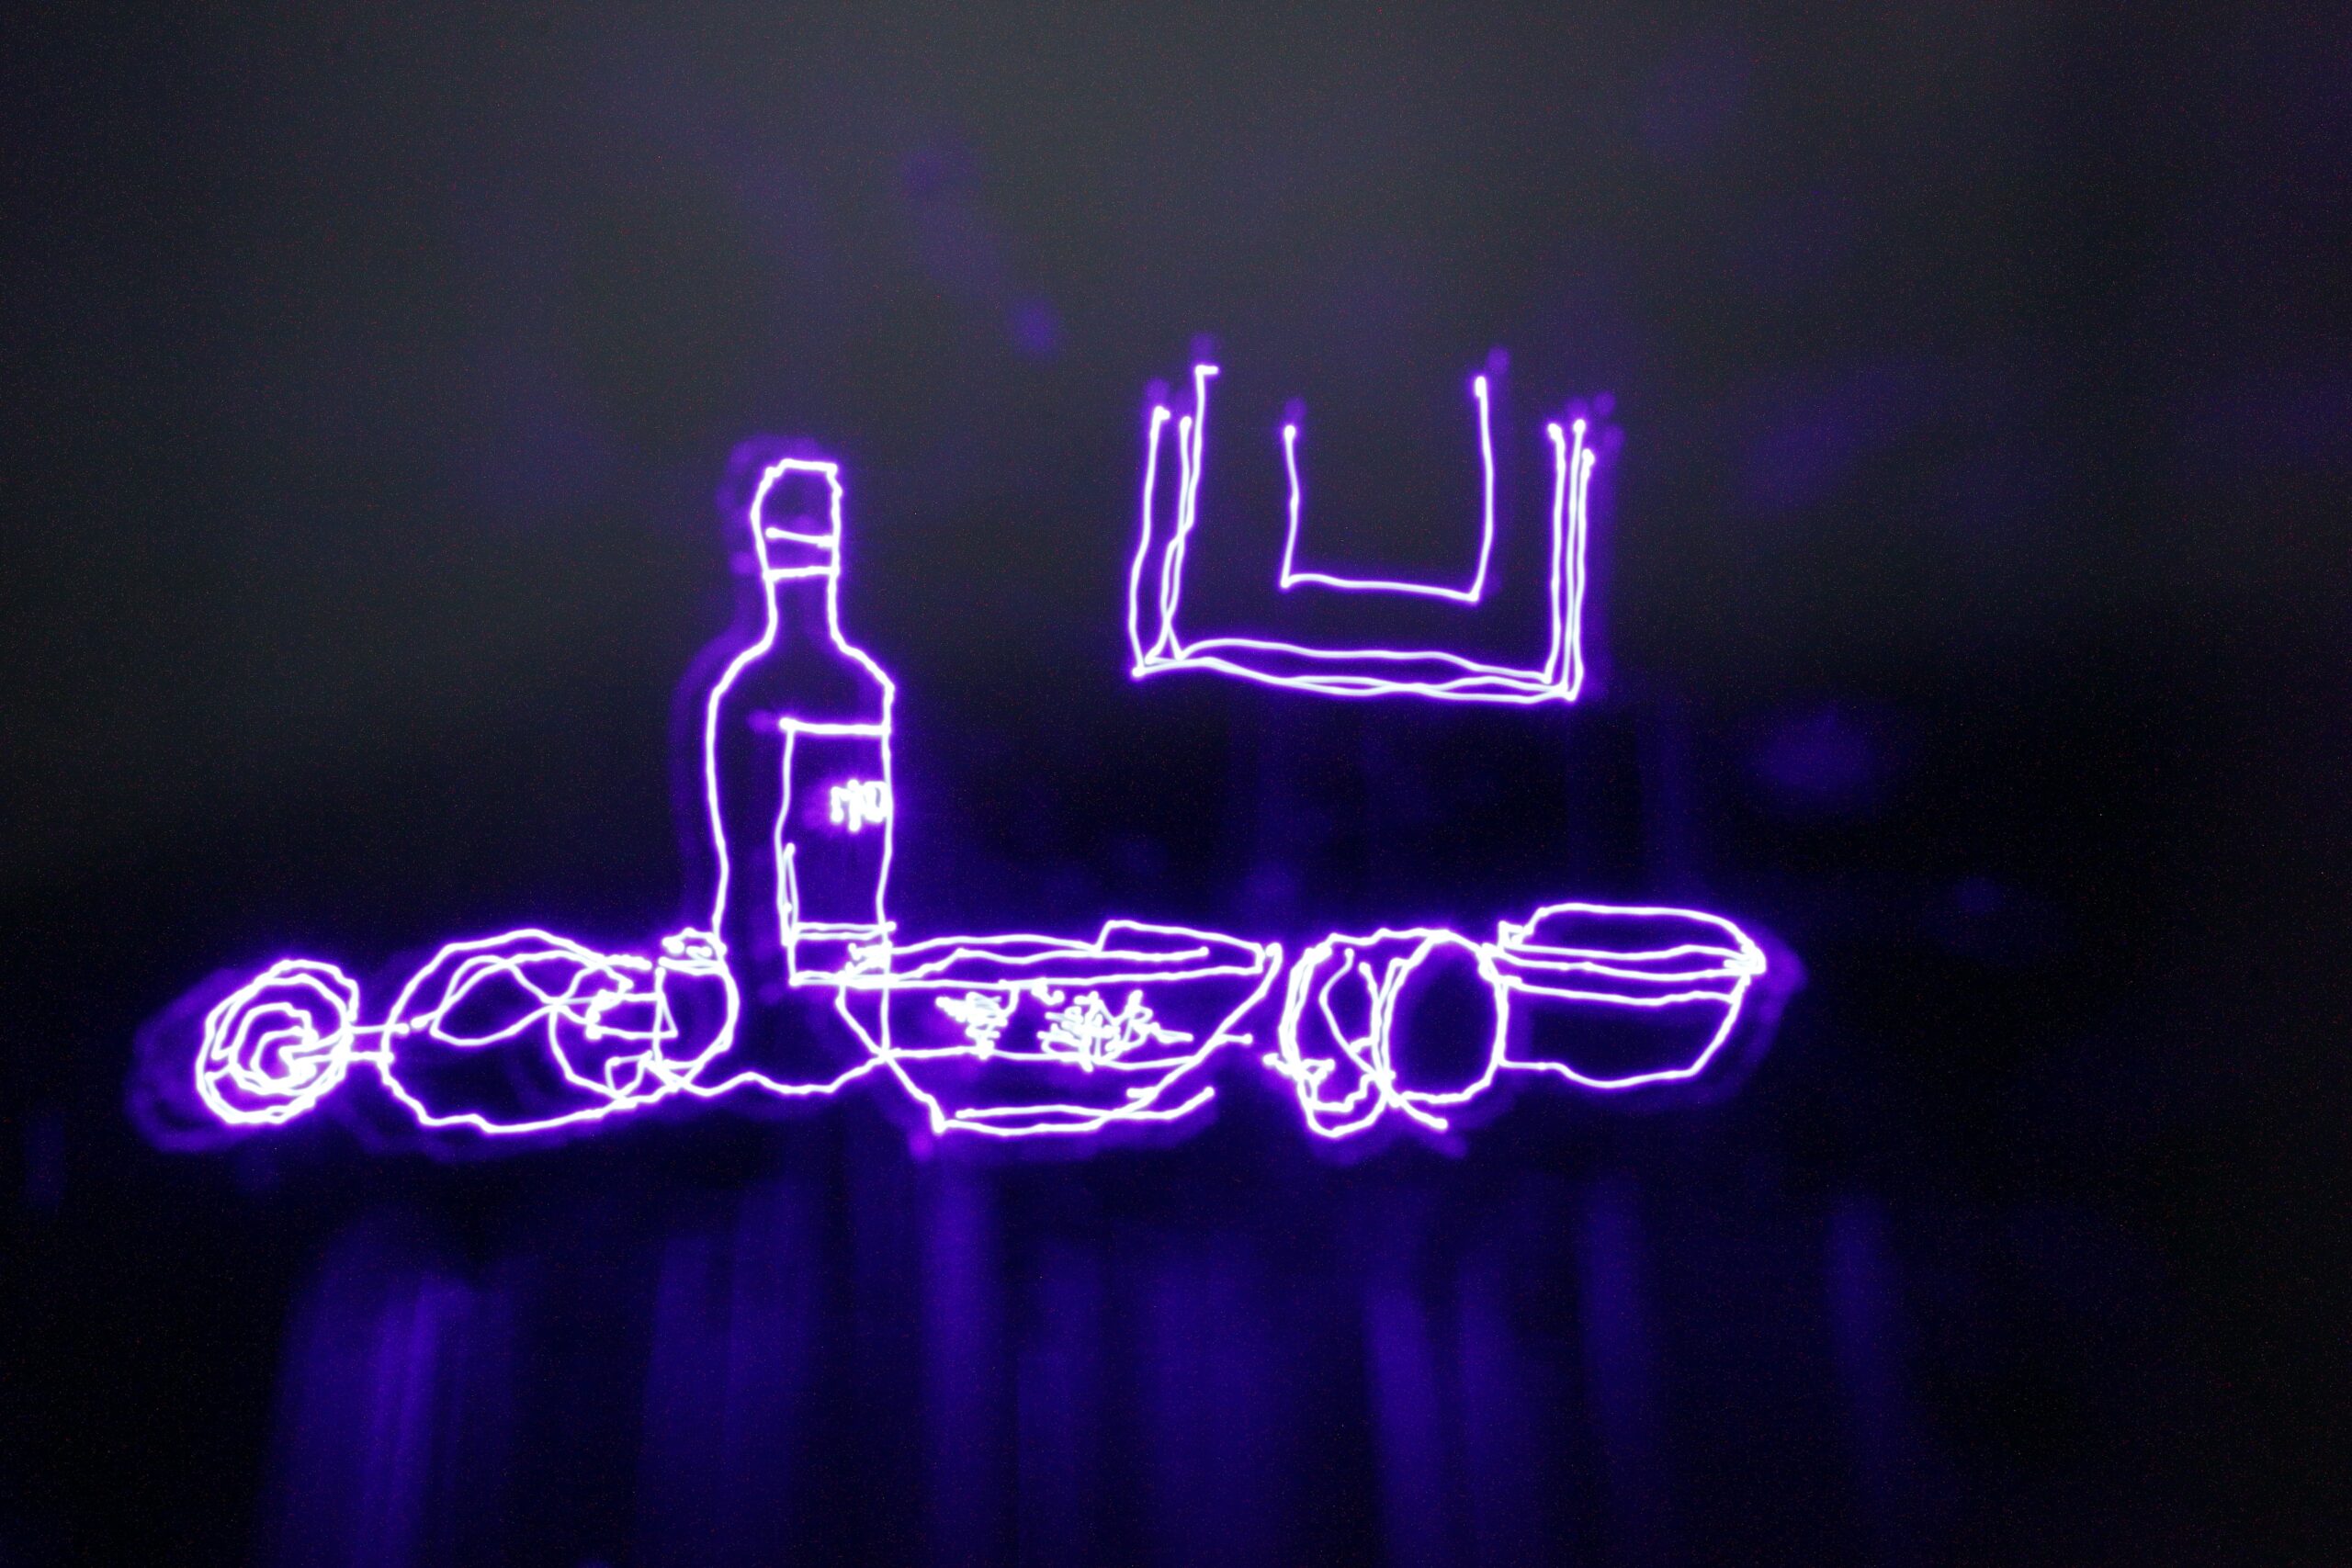
Moving to an LED light source meant it was easier to set-up and proved successful, however once printed, the ‘drawing’ no longer looked like a drawing done by a camera. This ambiguity lead me to try new ideas. I tried a candle instead of the LED, but found that the glow was too much – the method is best effected by a small field light source, pen-light-like. I then not only decided to go back to the LED, but also decided to replace the digital camera with a Polaroid camera as there can be no (little?) argument that the camera did the drawing.
The traditional Polaroid is a typical ‘point-and-shoot’ device which did not have the bulb shutter setting I needed for these long exposure drawings. I came across the Polaroid’s Impossible Project i-1 camera that has Bluetooth connectivity with bulb-type capabilities as part of their phone app.
Once the camera was sorted, not having the luxury of the digital camera’s cost-effective trial and error “who cares how many re-shoots it takes” method I needed to be very careful when setting the system up. My first attempt took six photos to configure the system for one shot
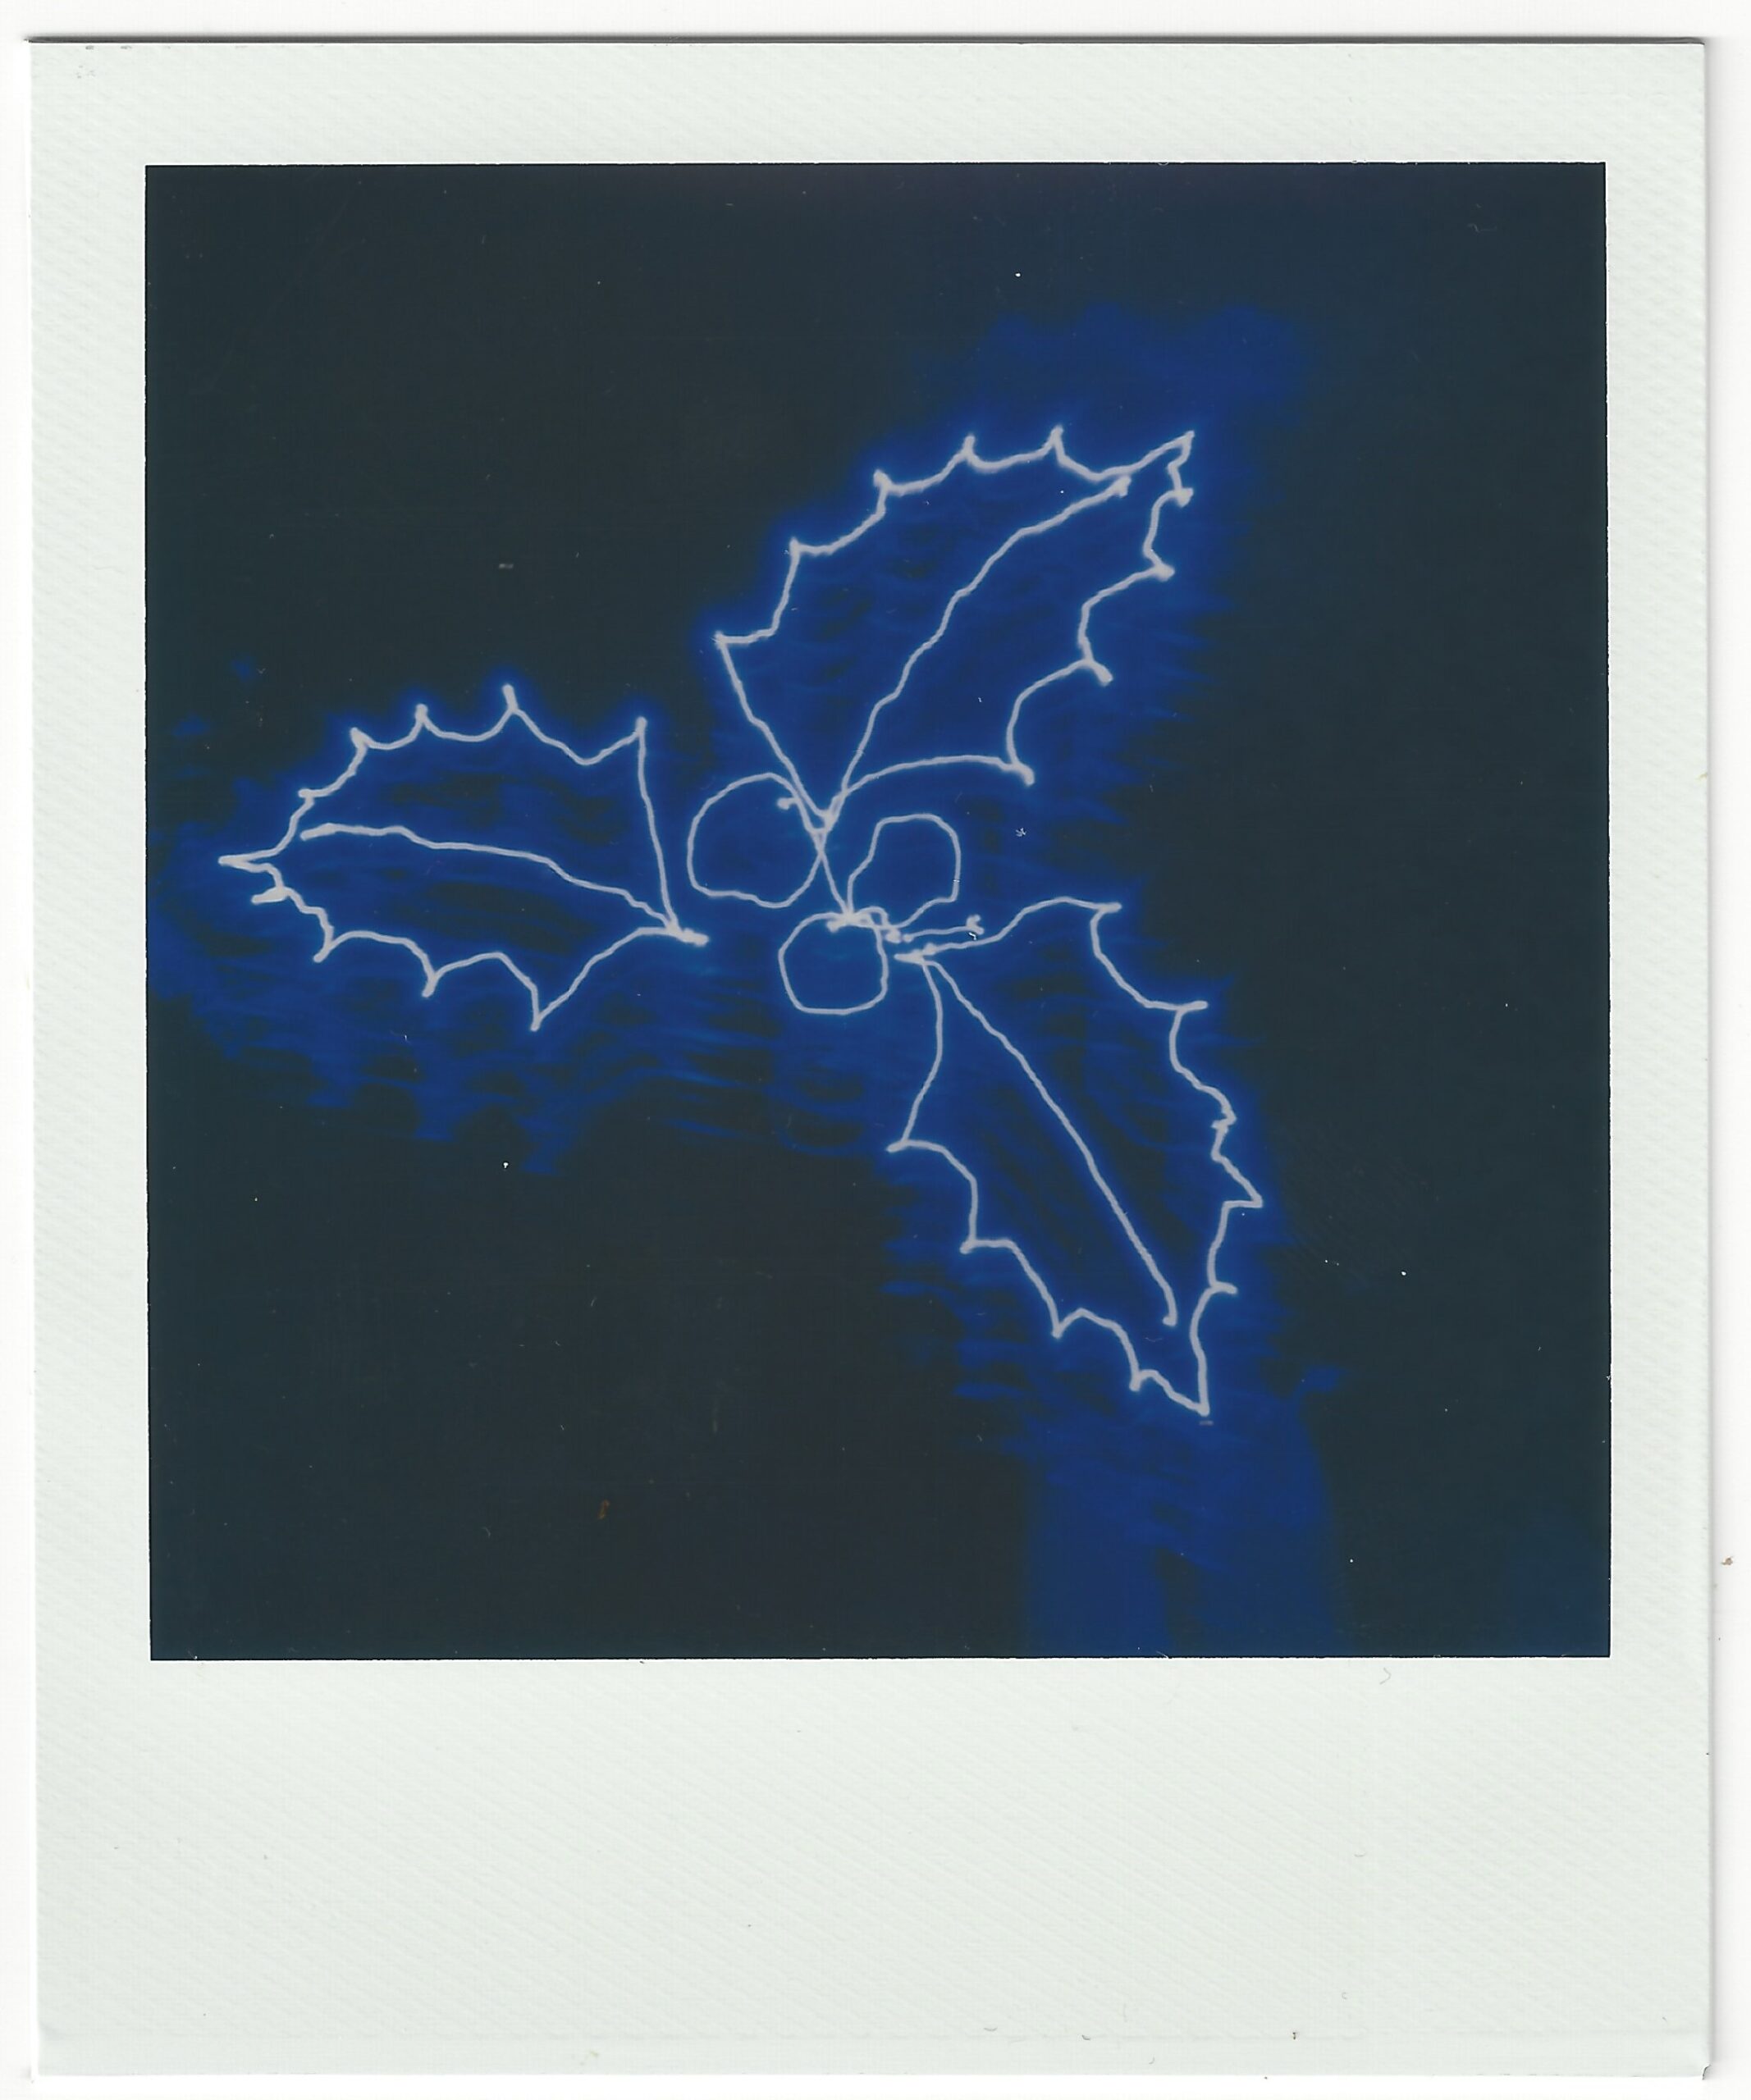
The final product, this Christmas Card (2020) design is as envisaged and I am pleased with the results. I will continue with “still life” as my ‘go to’ subject in keeping with atelier practices which lean towards placed objects to help the artist develop skills and techniques.
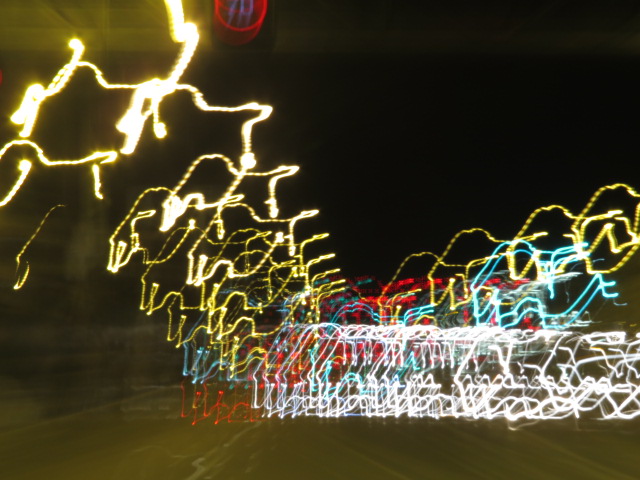
First Christmas Card attempt using digital camera and some post. My light source was Christmas lights hence the many light blurs that had to be removed in post.